Facebook has one of the largest, most robust and segmented audiences of any social media platform. That’s thanks in part to all the information they request when a user signs up: age, gender, location, interests, hobbies, and more—a dream for marketers looking to target a very specific group of people.
And now more than ever, Facebook’s algorithms are prioritizing video content, showing users more and more video over other types of content. If you’re a brand with an amazing commercial or brand video, this should be music to your ears!
Advertising your video on Facebook means paying a relatively small amount to increase your video’s exposure, spreading your brand’s awareness and engagement to your exact target audience. Facebook facilitates this all through their intuitive ads platform, which helps you set up your campaign, pick your video placement, and launch your ads in a matter of minutes.
Today, we’re breaking down exactly how to do just that, helping you set up your video advertising and distribution with a step-by-step outline you can use anytime to launch your Facebook video ad campaign.
Let’s get started!
There are multiple ways to promote your video across Facebook, but we’re focusing on the most common (using Facebook Ads Manager), which gives brands like yours more opportunities for campaign success.
Before you begin, get familiar with the Facebook Ads platform. Here’s a helpful graphic that outlines exactly how Facebook ads are organized, explaining how campaigns, ad sets, and ads all relate to one another.

To break down exactly how Facebook Ads work, we’re using our own client as our how-to guinea pig. We created this promo video for Frog Legs, a culinary academy based in Washington that provides students a hands-on approach to culinary education.
Step 1: Get Started
Go to the top of our account’s profile page and click “Create Ads.”
Step 2: Create Your Campaign
Pick a campaign objective. By now, you should already have a goal in mind, like attracting new customers, engaging with current visitors, nurturing prospective leads, or delighting previous customers. Take a look at Facebook’s own recommendations for picking the proper marketing goal.
Once you get to your Ads dashboard, click on “Create.” You’ll have the option to switch from Quick Creation to Guided Creation. Both are similar, but Guided Creation offers more visual guidance for easier setup. Here, we’ll be using Guided Creation.
Our main goal with the Frog Legs video ad is to get people excited and actually watch the video, raising brand awareness. So here, we’ll select video views.

You’ll also be able determine your campaign’s budget. Facebook will distribute it across all of your ad sets, allocating more toward the ad set with better performance.
Setting your budget here is not mandatory, but we recommend it in order to set your monetary limits and avoid overspending. You can set up a daily or lifetime budget – we’re opting for a daily budget of $100.

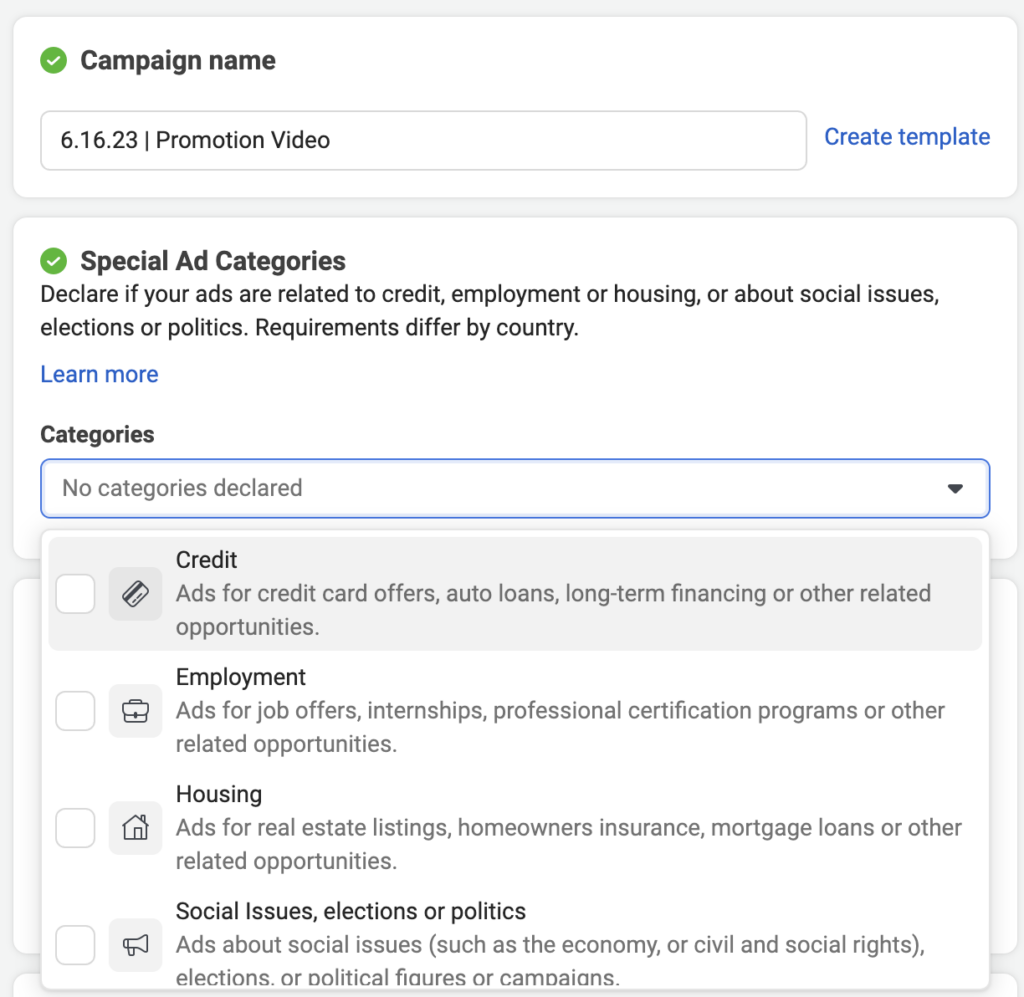
Step 3: Name Campaign and Choose Special Ads Category
When naming your campaign, it’s important to choose a clear and descriptive name that reflects its purpose. This will make it easier for you to identify and manage your campaigns later on. Consider using a naming convention that includes relevant details such as the campaign objective, target audience, or promotion period. For this campaign, we used the name “promotion video” given the specific video type.
Facebook provides special ads categories to help you reach your target audience effectively and comply with anti-discrimination policies. These categories are designed to prevent discriminatory practices and ensure fair ad targeting across various sensitive attributes like age, gender, race, and more. Depending on the nature of your business or the type of content you’re promoting, you’ll need to select the appropriate special ads category: housing, employment, credit, or social issues.
Step 4: Pick Your Audience Targeting
What’s your buyer’s persona? You should have this mapped out way in advance, since it typically guides all your marketing initiatives. Your buyer’s persona should outline exactly who your target audience is, what similar traits or demographics they share, and how to best reach them. Use this information to set up your Facebook ad audience targeting.
Geo and Interests
One of the advantages of Facebook advertising is the ability to geo-fence your ad, allowing you to target an audience within a specific mile radius of zip codes you choose. This is an especially useful tool for local businesses.
We’ll use a 10-mile radius of the academy’s main location.
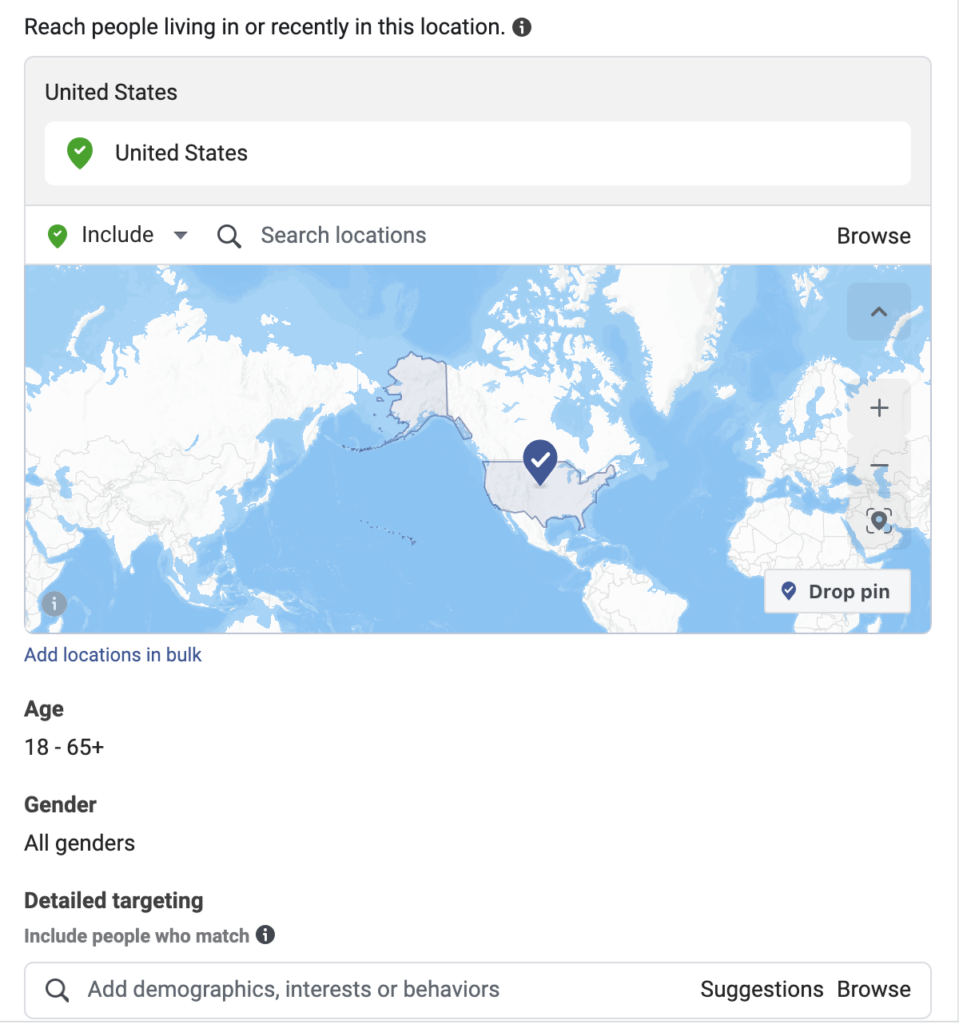
Because the content of our video focuses on children’s classes offered by Frog Legs, we know our potential customers will be parents of children between the ages of 9 and 18 who are also interested in cooking and recipes.

The key in this step is finding the right balance in reachability. If you’re not specific enough, you’ll deliver your ads to people outside of your target, wasting your budget. If you’re targeting is too specific, you run the risk of increased ad fatigue.
On the right, Facebook will give you estimate details about your audience size and how broad it may be. With our selections, we have a potential reach of 31,000 people. In our case, this is perfect for raising awareness in the area, increasing brand interest, and collecting user data.
Step 4: Pick Your Ad Placement
Once your audience is ready, you’ll define where your ads will be shown. To do that, you’ll need to know about your product or service, its audience, the platforms they frequent, and your video’s length and format. The placement for a nationwide fashion ecommerce website will be different than that of a local golf club, for example.
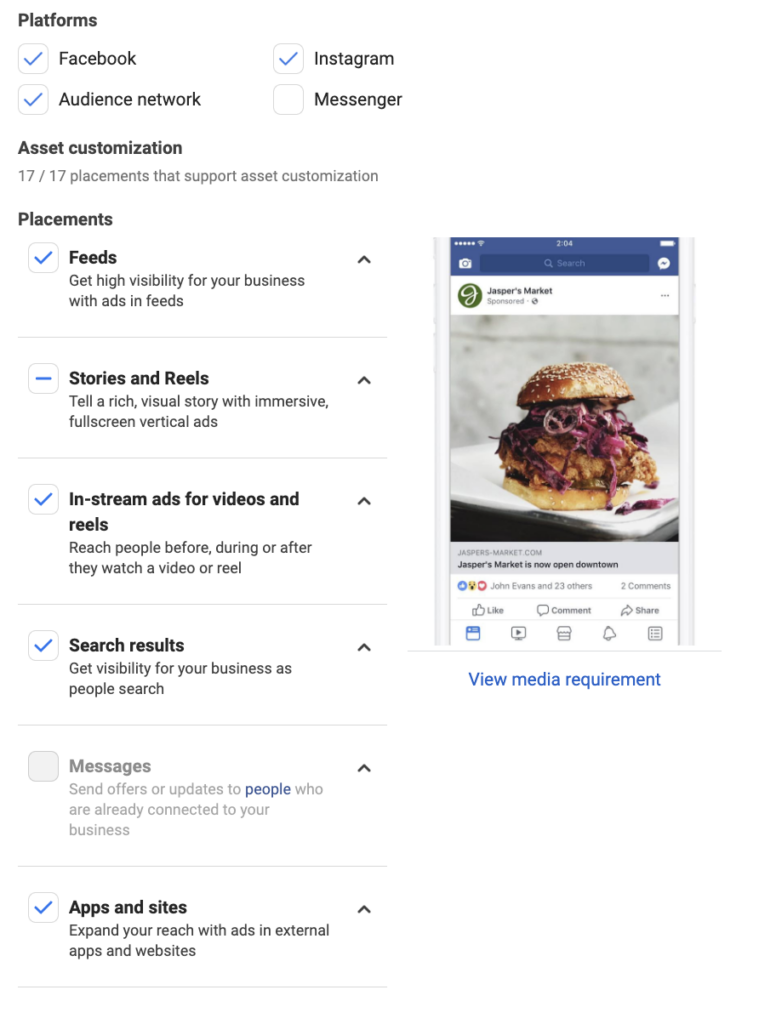
You can also define whether you’d like to target Android or iOS; this is especially useful when promoting a mobile app.
Step 5: Set Your Budget
Next, set your daily and lifetime budget caps, and schedule when you want your ads to run. If you don’t have a preference in terms of schedule, give yourself 72 hours to assess how the ads are running before altering for peak engagement.
Step 6: Upload Your Video
Here’s where the magic happens! It’s time to pick your video creative and upload it to the platform.
Select your Facebook Page and/or Instagram account.

You can either create a new ad or use a previously published post. If you’ve already posted your video on your Facebook page along with a great copy, for instance, you don’t have to duplicate it. Instead, click “Use Existing Post” and select the video.
For a new post, you’ll need to choose the format and upload your video.

Since we only want to advertise one video, we’re picking “Single Video” and not “Slideshow.”
Once your video is ready, start customizing it! Select a captivating thumbnail – Facebook will give you a few options, but if you don’t like any of those, you can upload a custom thumbnail.

Though it’s not mandatory, you can also edit your video captions, which will increase audience engagement.
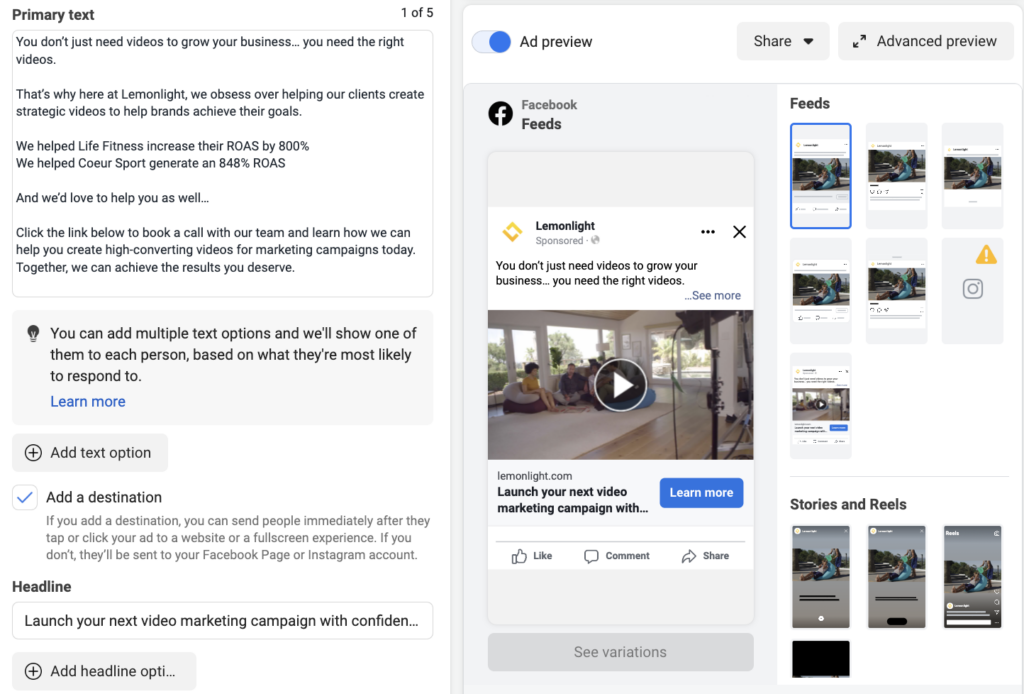
Step 7: Write Your Copy and Set Your URL
Be creative here. Talk to your audience in their own voice and try to stand out. Try launching different copy variations to test which drives a better cost per view and CTR.
Finally, you can set up a target URL that leads to your landing page or website, where you’ll drive people to get to know more about your services. If you do, Facebook will allow you to add a captivating headline and a news feed link description. If you’re offering a specific deal or offer, take advantage and use a powerful call to action here!
We recommend using a UTM link so you can accurately measure your results. It’ll allow you to track specific actions on your website and help you determine how successful your campaign is. It’ll also help you figure out which audience is generating more sales, engaging more with your website, and generating more revenue.
Finally, review. Does everything look good? Then your last step is to click Confirm and your new ad will start to deliver impressions in just a few short minutes!
If you need help figuring out how to create a video optimized for Facebook, don’t forget to check out our video ad specs guide, where we break down everything you need to know.
Let’s Work Together
Need help creating a video that’ll attract, engage, and captivate your Facebook audience? We can help! We’ve created over 16,000 videos for brands just like yours, and we can help you knock your Facebook video ad out of the park.


